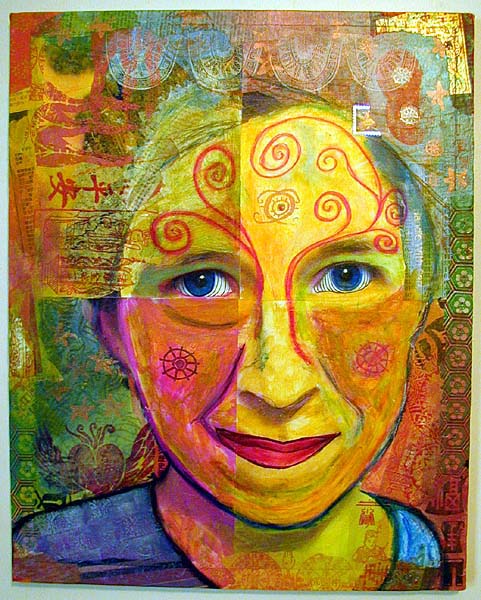
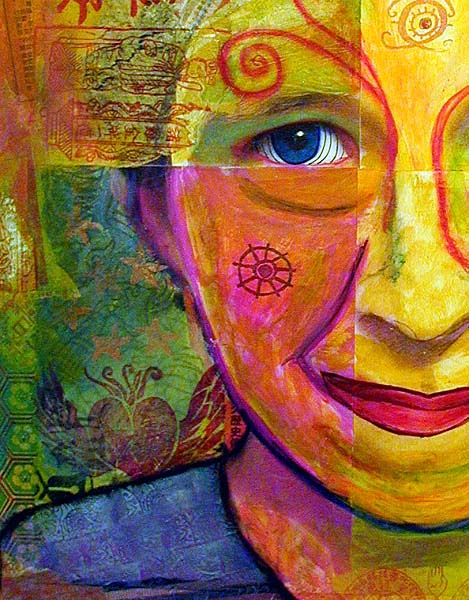
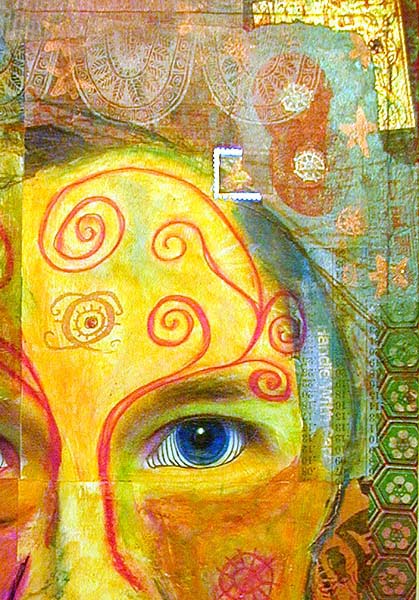
Uber Self-Portraits: Larger than Life
$135
Traci Bunkers
Student Level: All Levels
Back by popular demand! Everyone had such a great time last year and created such incredible pieces, I’m teaching this again! Even if you have no painting or drawing skills, in this process & project oriented class, you can create a mixed-media self-portrait that is larger than life and out of this world in coolness. Not only will I show you how to make this 16” x 20” work of art, I’ll also show you the beauty in looking big and working big. We’ll paint, draw, collage and stamp on top of blown-up photo copies to create a piece of art that blurs the line between a photograph and a painting. The process is started in pieces and then joined together to be finished as a whole. It can be mounted in class on a stretched canvas or canvas board so it’s ready for framing. Or, you can mount or frame it when you get home. This project is also great for experimenting with different coloring materials or mark making techniques
Supply List:
Scissors
Glue sticks
Exacto knife & sharp blades
Cutting mat
Various coloring materials: Acrylic paints (cheap craft paints are fine), water soluble oil pastels, watercolor crayons, markers, etc.
Paint brushes (a cheap 1” and small round for detail)
Gel medium
Brayer
Collage materials
Permanent stamp pads (Staz-on works best!) and stamps
Self-portrait photograph prepared and copied as listed under “Homework”
Optional:
Hair dryer or heat gun to speed up drying
needle, thread & beads if you want to sew/embellish
16” x 20” stretched canvas or canvas board (I prefer to mount it on either stretched canvas or canvas board to finish working on it as a whole, but for ease in packing, you might choose to do it at home.)
Homework
This is easier than it sounds! I’m just being very explicit!
Mark your self-portrait photo on the back at the center of the lengths & widths. Cut in half each way: this gives you 4 equally sized quadrants. (Example: 4” x 6” photo would have 4 pieces 2” x 3”; 8” x 10” would give you 4” x 5” pieces)
Take to Kinko’s-type place to make color copies (must be toner based on heavy paper because we will be getting them wet! No Inkjet prints.). Copy each section, enlarging it enough to be anywhere from 7” x 9” to 8”x10”. (Note: On some copy machines, if you put the photo right up to the edge, the edge is cut off. Be sure none of the edges are cut off or you will have parts missing.) The size is approximate and it might not meet those measurements both directions depending on your original size. Be sure all sections are enlarged the same percentage! (Example, with your 2” x 3” pieces cut from previous step, enlarged 333% would make an image 6.66” x 10”. The size is loosey goosey, just be sure they are all enlarged the same percentage and each section isn’t bigger than 8” x 10”.) If you need help figuring out the percentage, e-mail me, or the Kinko’s person should be able to help you. If you want “back-up” have 2 copies of each section, just in case. . . . But 1 of each is fine!
Questions? Email Traci at Bonkers@bonkersfiber.com
Web site: www.bonkersfiber.com
Click on a picture to see a larger image. Use your browser "back" button to return to this page.
 |
 |
 |